
What to expect from this installation
The installation will consist of five main steps:
- Installing MetaBuilder.
- Configure a local instance on your machine.
- Installing SSMS
- Restoring the MetaBuilder Database.
- Configuring the settings file.
MetaBuilder utilises a
database which undergirds its operation and therefore requires a three-part
installation. In the installation files you will find the SQL Server Installation Centre, Microsoft SQL Server Management Studio (SSMS) Setup and MetaBuilder Setup files.
The client and server installation are identical. The only difference arises in Step 6 below.
1. Installing MetaBuilder
In your Downloads folder, double click on metabuilderwithsql.exe application file. When the blue screen appears, select underlined More Info and select Run anyway and Agree. When the installation prompt screen appears, please select the Browse option.
Do not install MetaBuilder into the Program Files. Rather use the specified file directory below, or when selecting the Browse... option, select the My Documents folder.
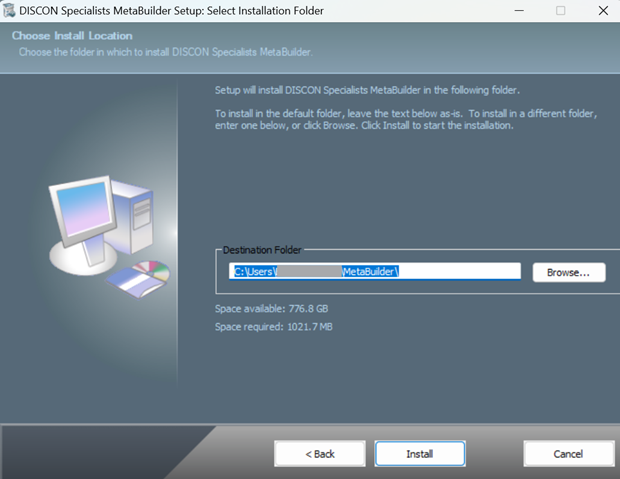
Please select the following file directory: Desktop > This PC > OS (C:) > Users > {Select the user you are working on} > And Press OK.
2. Configure a local instance on your machine
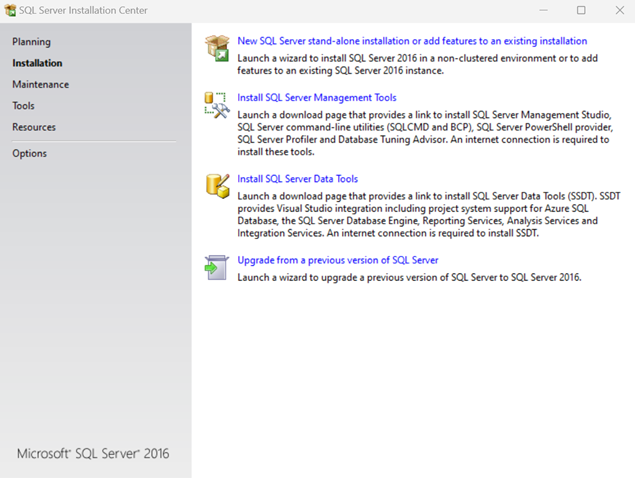
Navigate to the aforementioned file directory and through the SQLEXP_... file to the SETUP.EXE application. Double-click on the SETUP.EXE application and select the topmost blue option: New SQL Server stand-alone installation or add features to an existing installation.
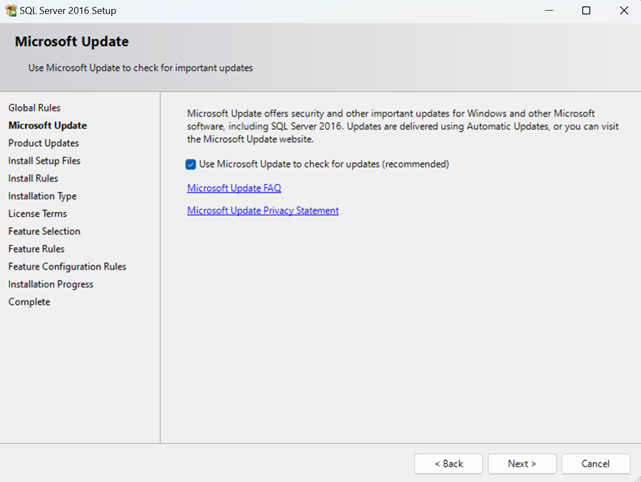
Select the Use Microsoft Update to Check for updates (recommended) option and click Next. Continue to click next:
After completing the Install Rules step, click next:
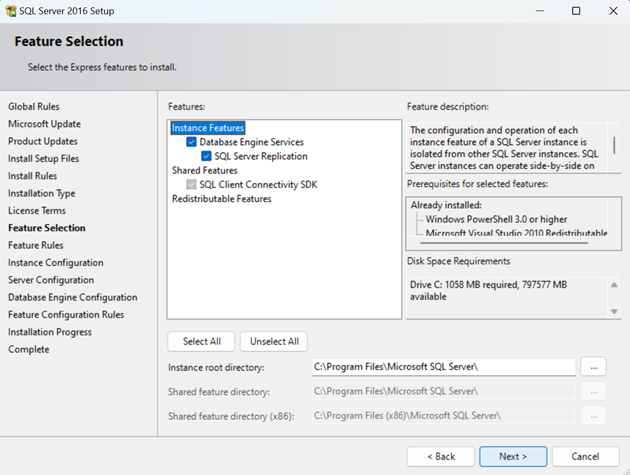
In the Installation Type, ensure to select the Perform a new installation of SQL Server 2016, and select Next. Be sure to accept the license terms and proceed to the Feature Selection. The default features (ticked Database Engine Serves and SQL Server Replication) will be selected by default. If they aren't, be sure to tick them and proceed.
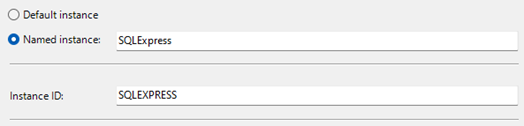
In the Instance Configuration step, type SQLExpress into the Named Instance dialog box. The Instance ID should automatically populate with all-caps letters when clicking inside the dialog box.
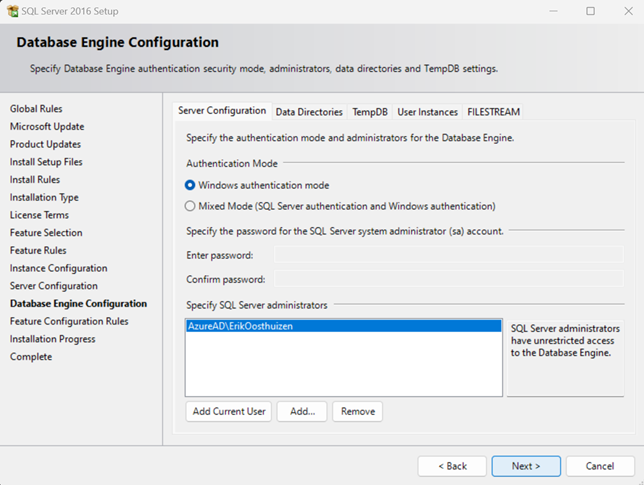
Then proceed to the next steps for this and the following to screens: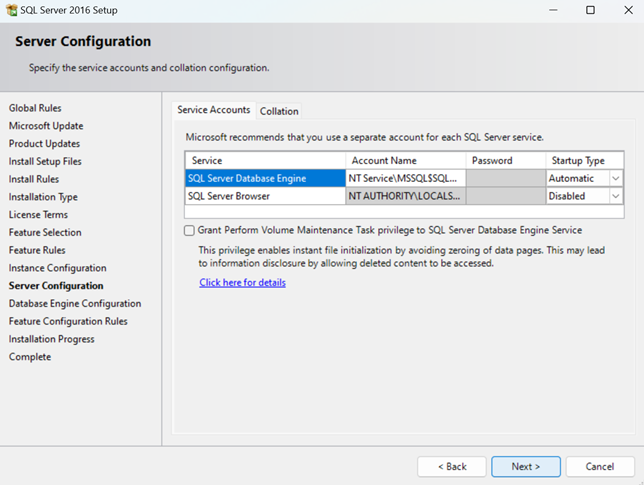
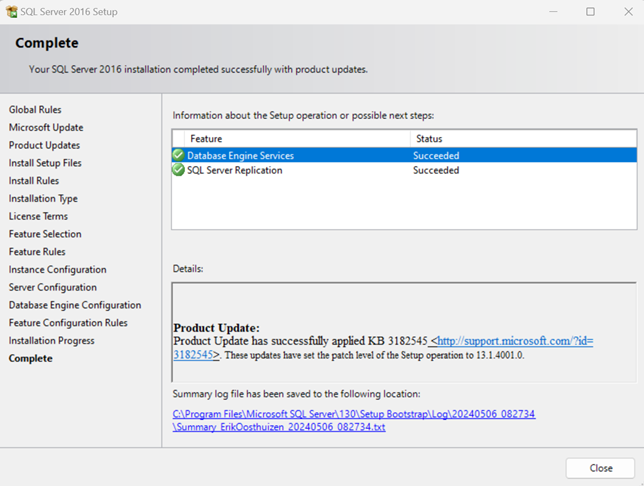
Complete the installation and close the Installation Centre.
3. Installing SSMS
After having configured a local instance for your machine, SSMS must also be installed. This will allow you to access, configure and work with the SQL Server we created in the previous step. To do this, you can obtain the file directly from the Microsoft website. Scroll down to the Download
Double click on the SSMS-Setup-EUN.exe file. When the following screen appears, select the Install option.
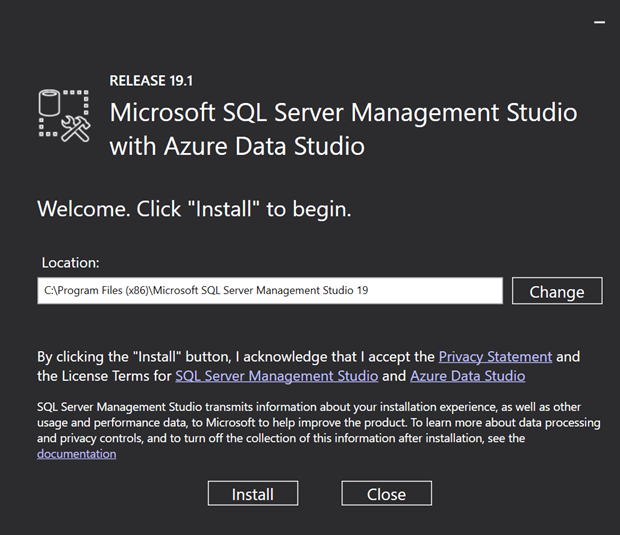
Close the installation page after completion. Please note, this installation will fail if the local instance of Step 3 has not been completed successfully.

4. Restoring the MetaBuilder database
This step consists of saving the provided MetaBuilder back-up file in your C-drive and restoring the MetaBuilder back-up database in SSMS.
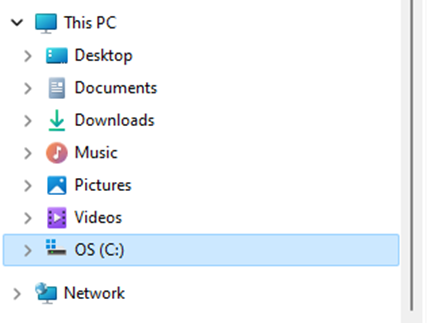
4.1. Saving the MetaBuilder database back-up file in your C-drive
In the installation files, copy the MetaBuilder.bak file and paste it in your C-drive. To get to your C-drive, open your File Explorer and navigate to the C-drive on the left-hand pane.
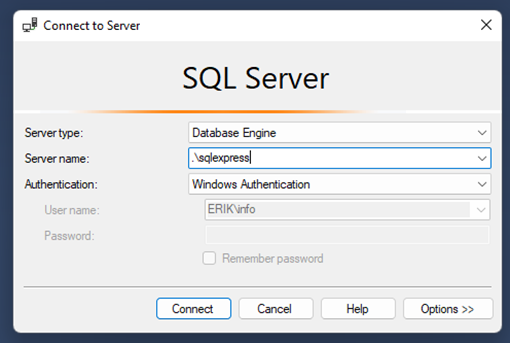
4.2. Restoring the MetaBuilder database in SSMS
Search for SSMS in your taskbar and open it. Ensure that Server name field is populated with .\SQLExpress (this must be the same as the name you specified when configuring the local instance on your machine in the Instance Configuration step). Click on connect:
Once the program has opened the object explorer on the left-hand side should look like the following when expanding the Databases file:
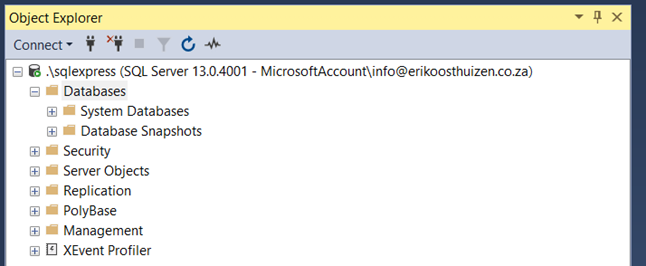
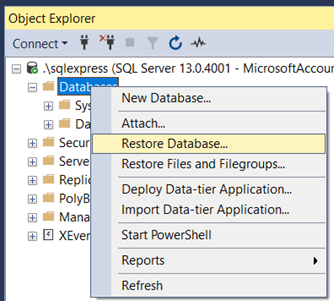
Right-click on Databases and then select <Restore Database…>
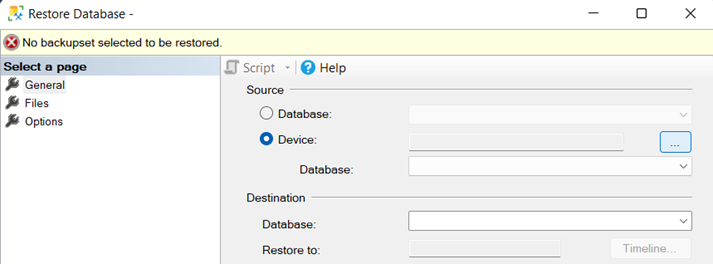
Then select the “Device” source option and click on the Ellipses points as indicated below:
Select “Add” and scroll to the top of the file directory and click on the C-drive folder at the very top left-hand side of the pop-up.

Then select the “Metabuilder.bak” file
and click “ok”. Then click on the “ok” button:

Thereafter, remove the Z from the “MetabuilderZ” entry under the Destination > Database tab and select “ok”.
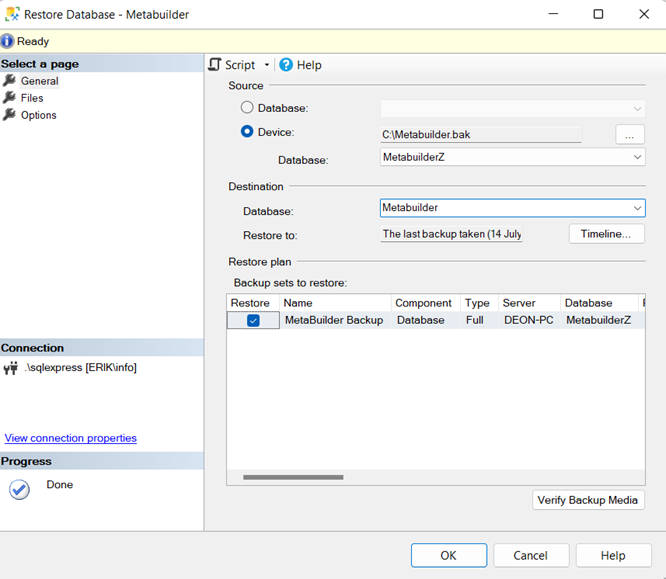
If the database restore was successful, the Metabuilder database should appear under the databases in the Object Explorer on the left-hand side.
5. Configuring the settings file
After installing MetaBuilder, navigate in your File Explorer to your C-Drive, select Users > ”The user you are working on” > Discon Specialists > MetaBuilder.
5.1. Configuring the settings file for the client functionality
Scroll down and to and open the settings file in the Notepad application. Please use the control find function to search for <Database_LocalInstanceConnectionString> and replace the string with:
<Database_LocalInstanceConnectionString>Server=.\SQLExpress;Initial Catalog=METABUILDER;Integrated Security=true;</Database_LocalInstanceConnectionString>
The top of your settings file, should look something similar to this:

Save and close the settings file.
5.2. Configuring the settings file for the server functionality
The same database restoring operations are needed for the Server Database in your organisation as is for the client instance referred to in Step 4 above.
Both the client and the server functionality depend on the client functionality. Before proceeding, ensure that your settings file has the client connection string as indicated above in Step 6.1.
<Database_SyncServerConnectionString>Server=.\SQLExpress;Initial Catalog=METABUILDERServer;Integrated Security=true;</Database_SyncServerConnectionString>
Please note, that you will need to replace the parts in bold above (.\SQLExpress and the METABUILDERServer) with your server and database name details. It might be necessary to use your server IP Address and port number instead of your server name which you can obtain from your Database Administrator. If this is the case, ensure that the port number settings are specified to be a static value. Also note, that when using the Server IP Address and Port Number, the following notation is important: "IPAddress, PortNumber". When including this into the settings file connection string, please leave out the quotation marks. The server connection string might then look something similar to this:
<Database_SyncServerConnectionString>Server={Your Server Name / Your Server IP Adress, Port Numebr};Initial Catalog={Your Server Database Name};Integrated Security=true;</Database_SyncServerConnectionString>After adding this, the top of your settings file should look something similar to this:

Or alternatively (if using the IP Address and Port Number):

Completion
MetaBuilder is now fully installed. You can search for MetaBuilder in your taskbar and open it. After installation, or upgrades, MetaBuilder might take a while to synchronise with the local and server database, however the startup process will be shorter thereafter. This process will be shorter in future start-ups.
Please note that without connection to the server, MetaBuilder will not be able to communicate with the server, and subsequently the server functionality will not be available.